CSC 111: Intro to Computer Science through Programming
Lab 9
Due: Friday, Apr. 14 at 11:59pm on Moodle
For this lab, first find your randomly assigned partner. Introduce yourselves - the person with the first name that comes last alphabetically should begin as the "driver", with the other partner as the "navigator". The driver will have the code open, and the navigator will have these instructions open.
At the end of the lab, email the code (finished or not) and transcript to the person who started as the navigator. If you do not finish during lab you have two options:
(1) Arrange to meet before Friday and finish the lab together.
(2) Continue the code separately and denote the part you did on your own with a comment.
Note: it is not an option for one person to complete the code on their own and then send the finished code to their partner to submit. Any code that you submit should be either written by you, or written by you and your partner while you were pair programming. Both partners should submit their code on Moodle.
Classes in Graphics
This lab will build on Lab 8 from last week, which was building a fractal tree using recursion. This week, we'll be modifying this code to make the shapes on the ends of the branches fall to the ground (inspired by the idea of autumn leaves). The idea is to create a Flower class instead of drawing each shape using a helper function. This class will make it easier to move the shapes later on in the program.
- Analyze the starter code
I would recommend beginning from this version of the solution to Lab 8, which you can modify for Lab 9: lab9.py. If you prefer though, start from your own version of Lab 8, as long as the shapes at the ends of the branches have at least two components (i.e. not just Circles or Polygons). Or you can modify your Lab 8 to make this the case, then go from there. In the steps below I'll be referring to the shape as a "flower", but feel free to modify to make the class name describe your work.
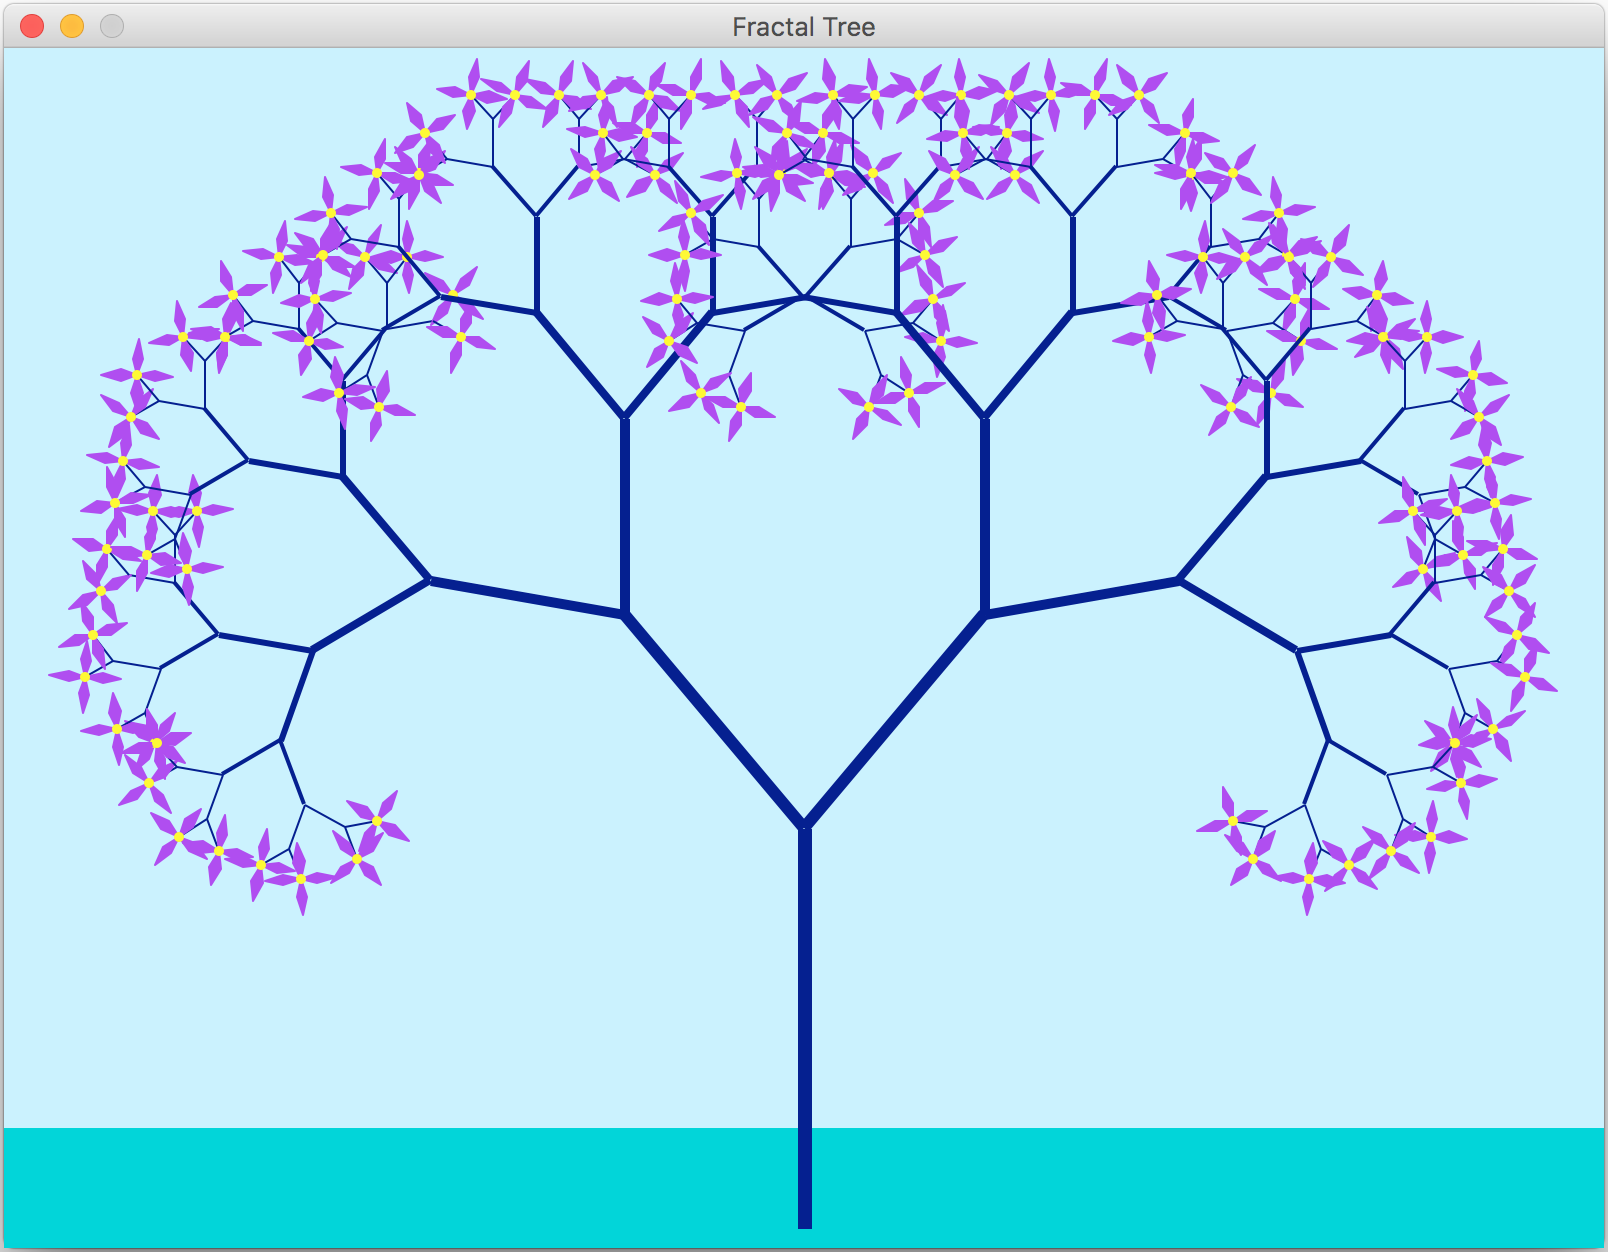
When you run the starter code, you should get a picture like this:

If it's taking too long to draw, feel free to reduce the order. Analyze this code with your partner. I've included some headings to separate the code a bit - this is not necessary but is often what I do when I'm organizing a lot of code. Read the helper functions and think about the parameters and return types, and see how one calls the other.
- Write the constructor and draw(..) method
The first coding step is to create a Flower class (see Day 29 and 30 for examples) and write the signature for the constructor. Think about the other constructors we've seen so far and what type of arguments they took in. I would recommend having either the Point where you want the Flower located as an argument, or the (x,y) coordinates. You could also include the size. Ultimately I want to be able to make a Flower and then draw it, just like our other graphics objects:

Within your constructor, move over all the code from the draw_flower(..) function. The idea is that the Flower class (specifically the constructor and the draw method) will replace this function. Now create a draw(..) method inside the Flower class. Think about the arguments it should take in. Then separate out the original draw_flower(..) code into the pieces that should be in the constructor, and the ones that should be in the draw(..) method.
The last part of this step is to also have the make_petal(..) function included in the class. This will not be a major change, but conceptually it belongs as part of the Flower class. I would suggest copying over this entire function and put it as another method inside the Flower class, right after the constructor. Make a slight modification to the arguments. Then, in the constructor, call this method using self.make_petal(..) since it is now a part of the class.
Switch Driver and Navigator here!
- Create an instance variable
At this point, it may seem cumbersome to have to call draw(..) on each component of the shape. To make our class more flexible, define a single instance variable for the class, which will be a list of shapes or components. Within the constructor, add each petal and the center to this list. Then in your draw(..) method, use a loop to draw each of these shapes.
- Test the constructor and draw(..) method
After writing the constructor and draw(..) method, we need to test. So in the base case of your recursive function, instead of calling draw_flower(..) which no longer exists, create a Flower instance and draw it, similar to the code above. Make sure this produces exactly the same output as before (it may seem as if we have done a lot of work for the same behavior, but it will be worth it in the next steps!)
Switch Driver and Navigator here!
- Making a list of flowers
Now that we have a way to make and draw flowers, we will build up a list of all the flowers in the tree, then make them fall one by one. To start this, create an empty list of flowers as a global variable at the top (usually we will not want to make this global, but in this case it will be a bit simpler since we'll be adding flowers via the recursive function). Then within the base case of the recursive function (where you make the flower), add the flower to this list.
Note: to avoid having the list of flowers being global, you can instead add it as an argument to the recursive function. I would recommend this way, but either way is fine as long as you understand what is going on.
In the main function, after the tree is completely finished, print out the number of flowers in the list. Does this number make sense given the order you've chosen? Can you find a formula for the number of flowers given the order? Write this as a comment in main.
Switch Driver and Navigator here!
- Falling flowers
Now we are finally ready to make the flowers fall to the ground. We have already done similar tasks with the snow and the star game, so this code will be similar. And since we now have a list of flowers, we can make each one move until it reaches the ground, then start the next one.
The piece we're missing is a move(..) method. Design a move method within the Flower class that will work similarly to the move methods we have for other graphics objects. Then call this within your loop structures in main.
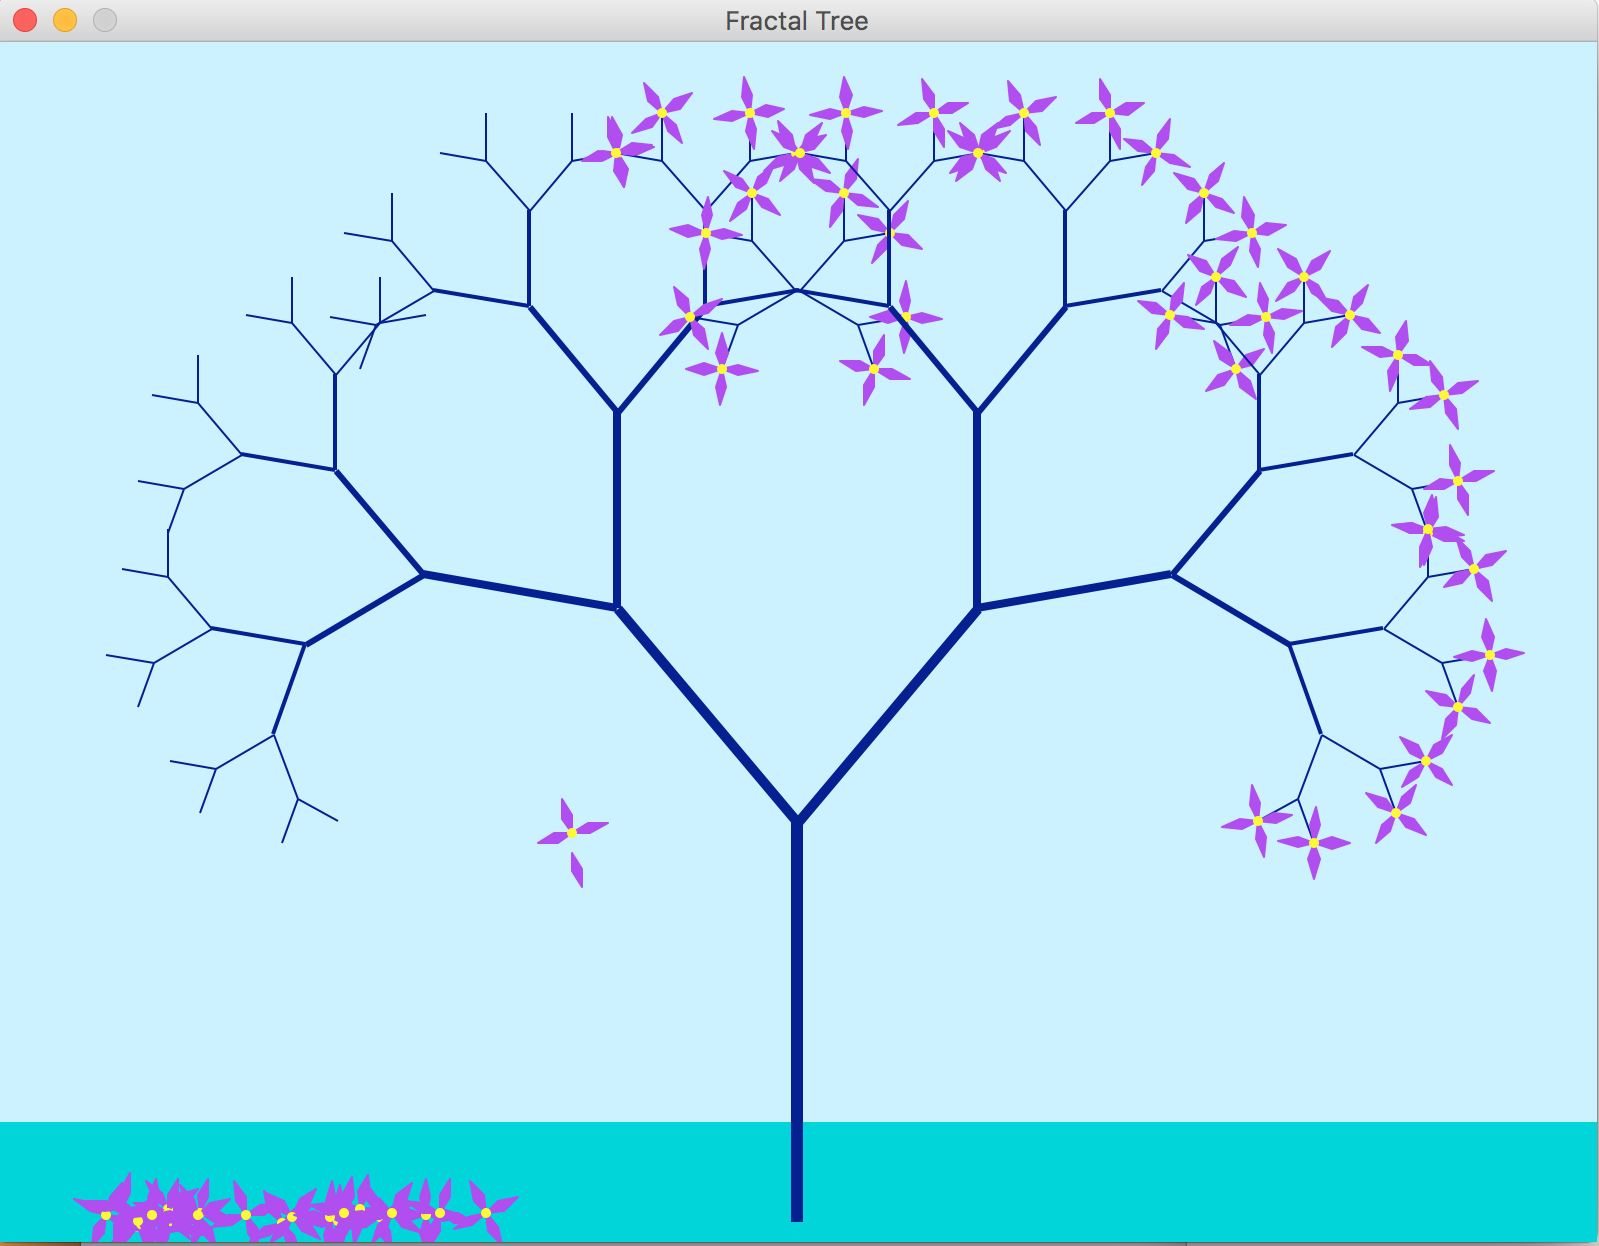
At an intermediate step in the animation, you should get a picture like this:

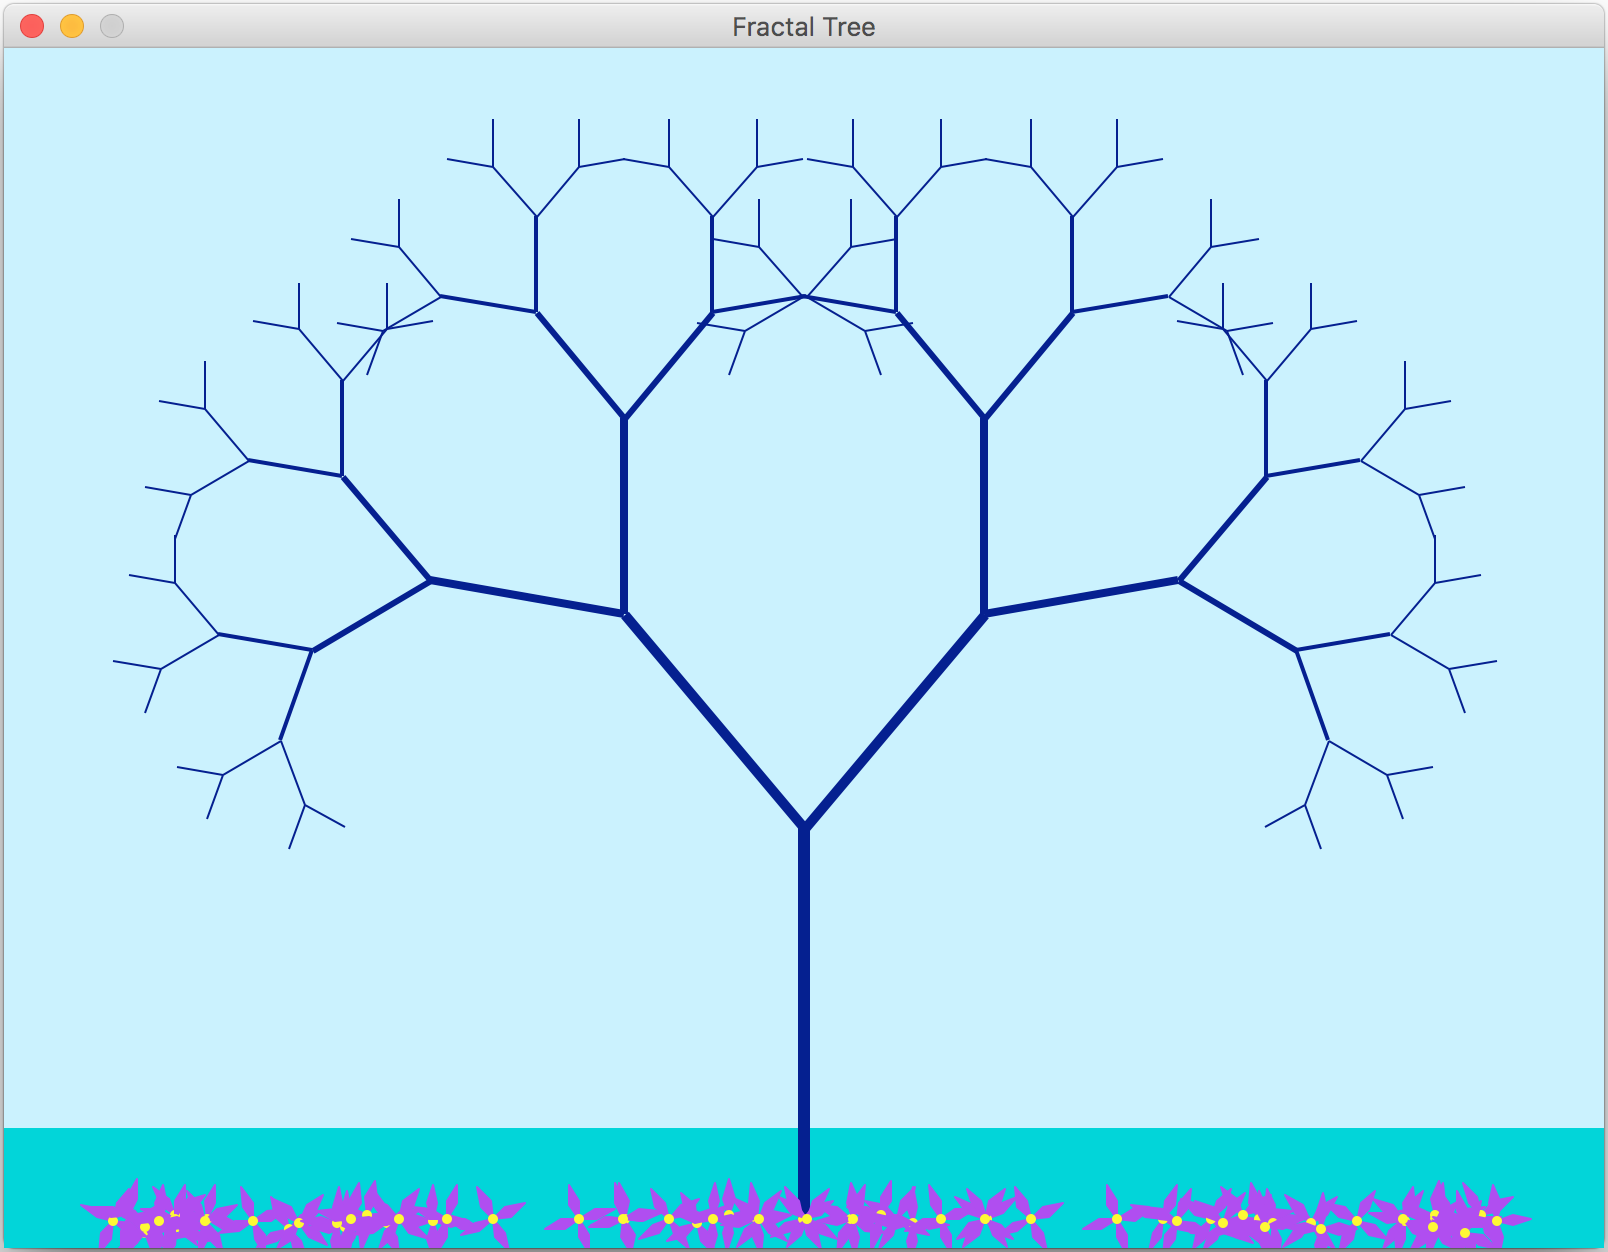
Here one petal is a bit lower than the rest of the falling flower. This is because the move(..) method will move each piece in turn. At the end of the animation, the picture should look something like this:

To make the flower stop at the ground, you may want to define another method in the Flower class to get the current y position. Alternatively, you could create a method is_at_y(h) that will take in one argument, the height of the window, and return True if the flower is at or below that y-value, and False otherwise. This can make your while loop a bit cleaner to write, but either way is fine.
Link to: Graphics Colors
You do not need to submit a transcript, but save a screenshot of the animation after it is finished (like the last image above) as tree_flowers.png. Make sure to include comments and think about variable name choices.
Extensions
- Change the colors/shapes/etc to provide a different type of scene (and/or add more detail or background shapes).
- Make the flowers fall in a random order (i.e. not left to right or right to left).
- Make a "four seasons" animation (can be realistic or not, up to you).
Submit
You do not have to submit a transcript for this lab. Make sure that both you and your partner have a copy of all the code written during the lab period. Both partners should submit the files:
- lab9.py
- tree_flowers.png