CSC 240: Computer Graphics
Lab 8: Robotic Arm
in-class
Step 0: Introduction
Download lab8.html and change the three.min.js path. When you open this file in a we browser, you should see something like this: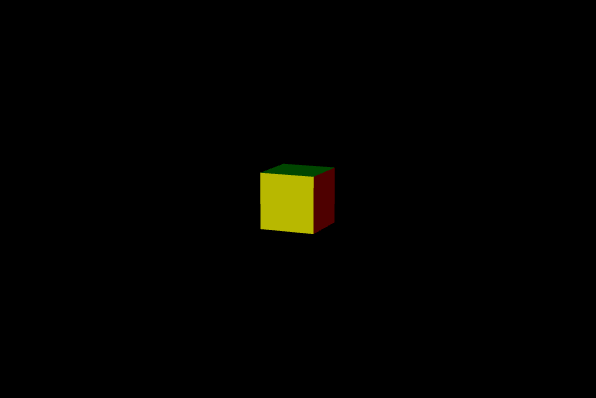
Step 1: Scale and Translate
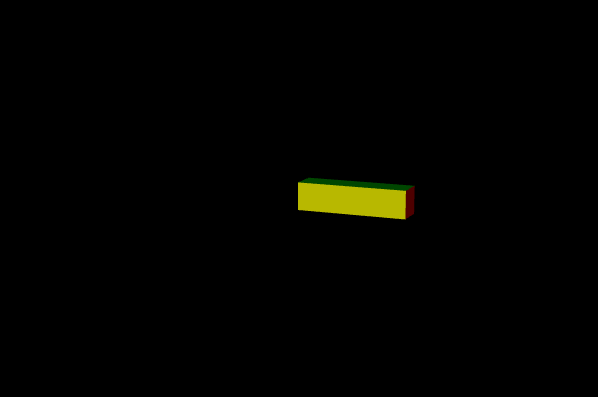
First, we will scale this cube and translate it so that the end of the arm is at the origin (right now the center is at the origin). Fill in the question marks below to get a picture like the one below.lowerCube.scale.set(?,?,?); // scale in the x,y,z directions lowerCube.position.x = ?; // translate in the x direction
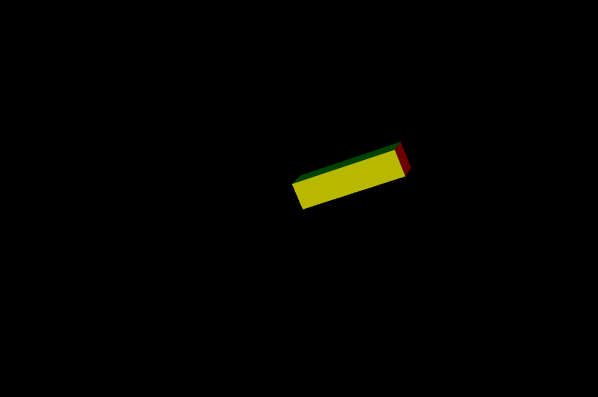
Step 2: Rotate the lower arm
Notice that at the top of our code there are two global variables: arm and lowerArm. These will be containers for the cubes that will make up the geometric components of the arm. We will rotate the arm variable which will rotate the entire arm, and separately rotate the lowerArm which will just rotate the lowerCube. Using the code below inside createWorld(), initialize these two objects and add them to the scene:// Initialize the parts of arm and add them to the scene arm = new THREE.Object3D(); lowerArm = new THREE.Object3D(); scene.add(arm); scene.add(lowerArm);Now add the lowerCube to the lowerArm using the add function. Then, inside the rendering loop, increment the rotation angle of the lowerArm. You should end up with the lowerArm spinning about the origin:
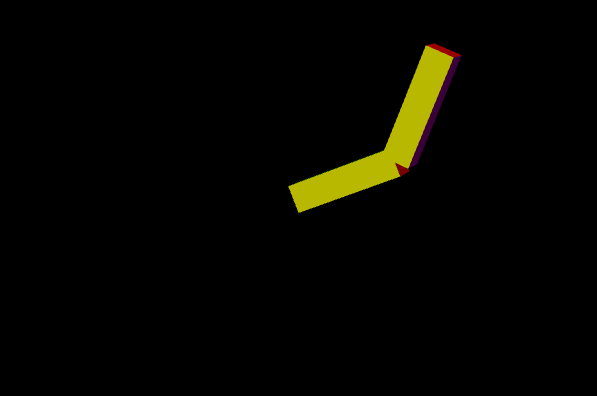
Step 3: Adding the upper arm
Now create another cube called upperCube, with the same geometry and materials as the lowerCube. Scale it in the same way. After that, add both the upperCube and the lowerArm to the arm variable (this is so that they are both rotated properly). Finally, change the rotation at the bottom to affect the arm (which will make it affect the entire scene; this is just so we can see it better).arm.rotation.set(0.2,-0.4,0);
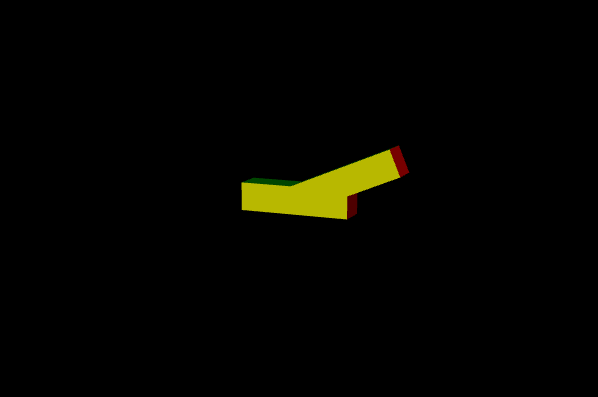
Step 4: Rotate the arm
Finally, we need to move the upperCube so that the end (shoulder) is at the origin, and the end of the lowerArm is at the elbow. To do this, change the positions of the upperCube and lowerArm accordingly. It seems like we didn't really need the lowerArm object and could have used the lowerCube directly. However, we need to rotate the lowerCube about its end, not its origin, which is the reason for creating the lowerArm variable.After moving the upperCube and lowerArm, rotate the arm variable inside the rendering loop (so you will have two rotations inside the loop).
Step 5: Using the keyboard
Instead of creating this continuous animation, we will explore user input. The goal of this step is to move the arm clockwise/counter-clockwise when the user presses the left/right arrow keys, and to move the lowerArm clockwise/counter-clockwise when the user presses the down/up arrow keys. First, we will need another library. Save the contents of the file below as KeyboardState.js:
Then uncomment the addition of this script at the top of the file. Also uncomment the creation of the global keyboard variable, the update() function, and the call to the update() function inside the rendering loop. Now, instead of having the rotation code inside the rending loop, add it to the appropriate place in the update function. Test it out with your keyboard!
Finish Up
You do not have to turn this lab in, but make sure both you and your pair programming partner have a copy by the end of the lab. Homework 7 will continue the concepts in this lab.