CSC 240: Computer Graphics
Lab 10: Texture Mapping
in-class
Note: I would recommend Safari or Firefox for this lab - in the latest version of Chrome the security settings can make importing images difficult.
Step 0: Open the code
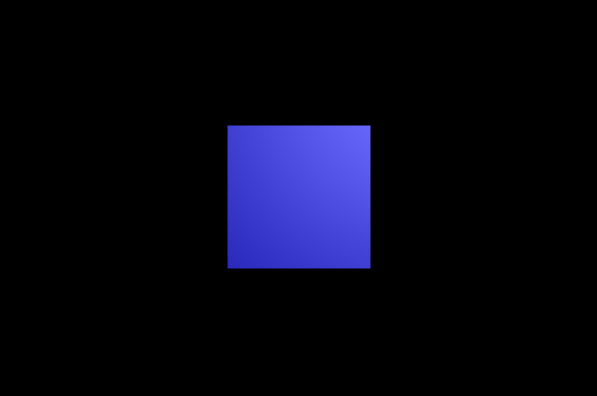
Download lab10.html and change the three.min.js path. When you open this file in a web browser, you should see a blue rotating cube:
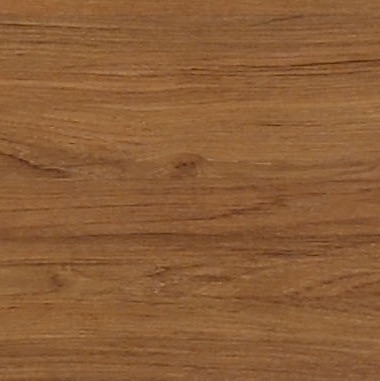
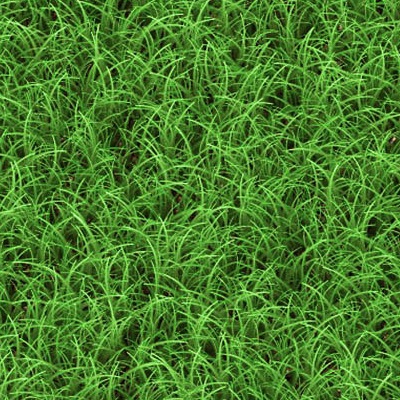
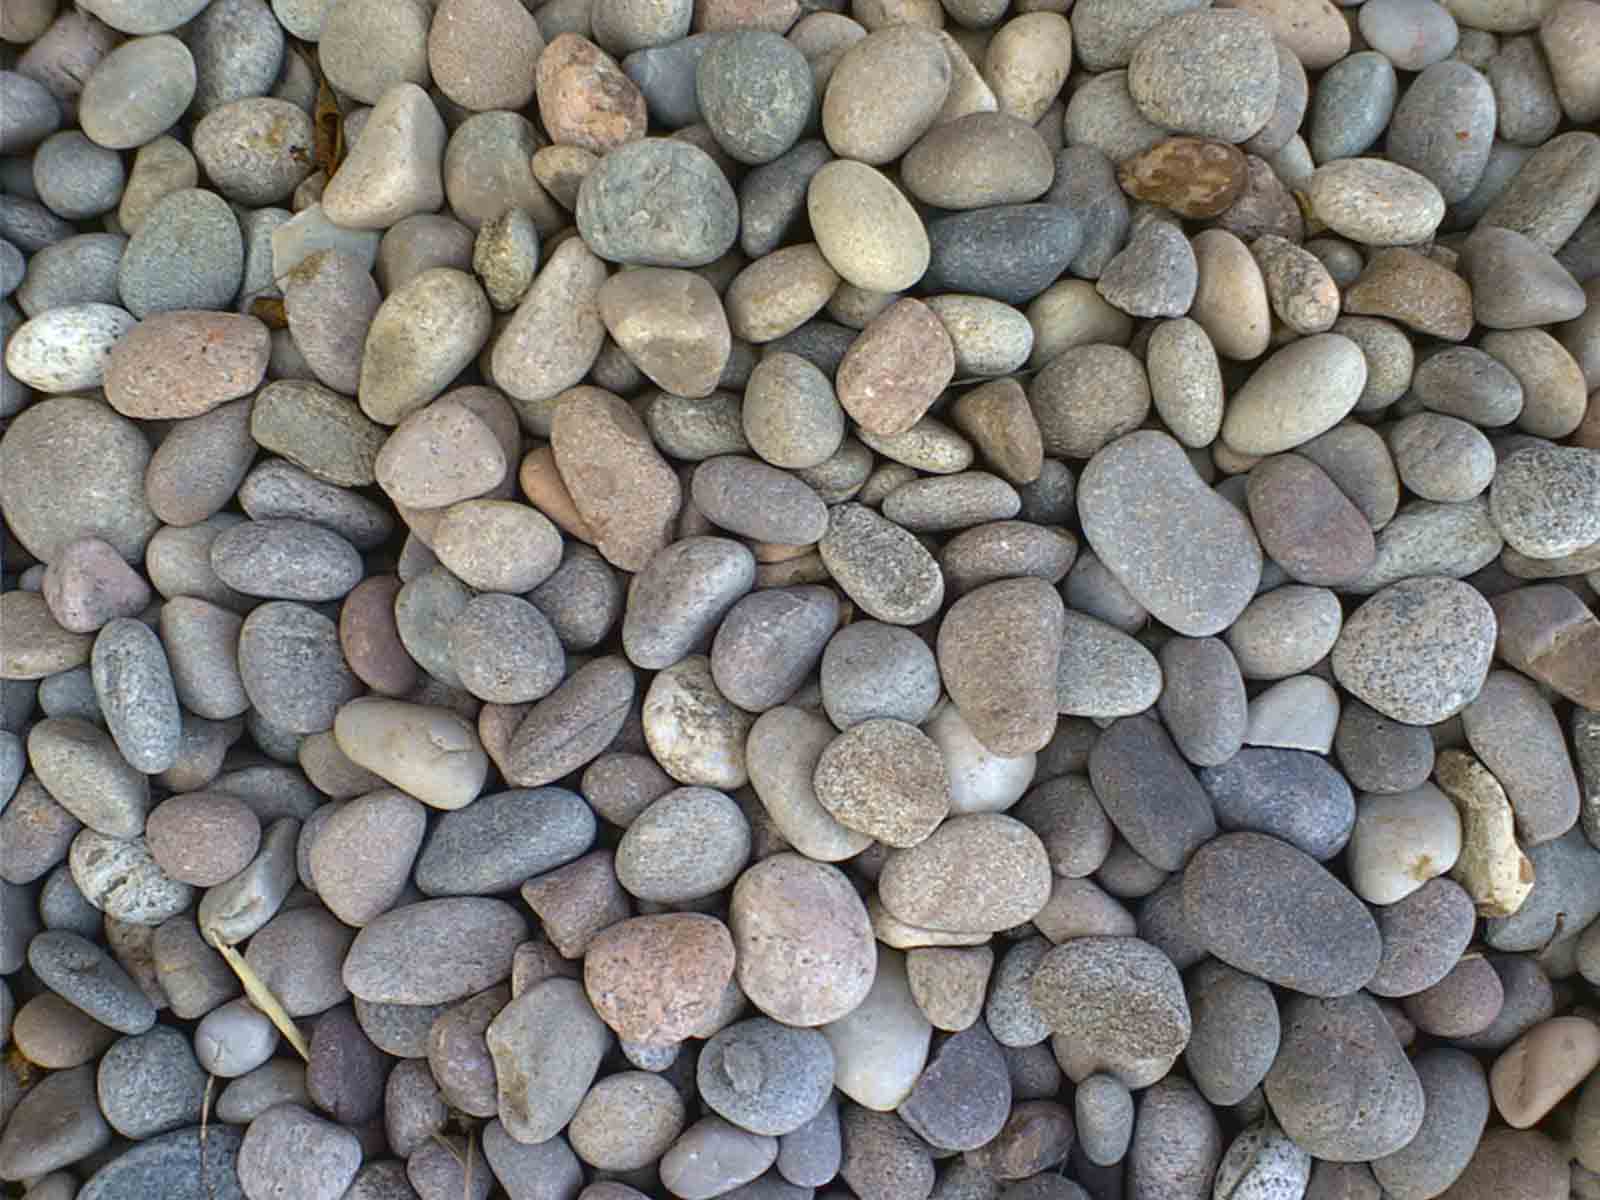
For this lab we will use several textures. Download the textures here and put them in the same folder as the lab code.
wood.jpg
apple.jpg
sky.jpg
wallpaper.jpg
grass.jpg
stone.jpg
Step 1: Use one texture
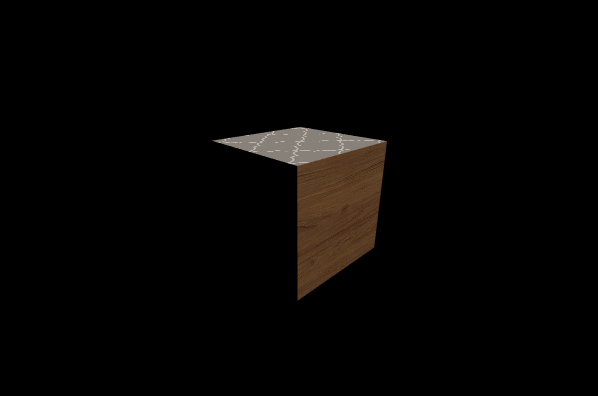
In the first step, we will use one image to texture the cube. Use the code below to change the blue cube to a wooden cube:
var woodTexture = THREE.ImageUtils.loadTexture("wood.jpg");
var woodMaterial = new THREE.MeshPhongMaterial( { map: woodTexture } );

// replace cube creation with:
cube = new THREE.Mesh(geometry, woodMaterial);
You might get a warning that the texture is not a "power of 2", meaning that the number of pixels is not a power of 2, which is desirable for texture mapping. We'll ignore this for now, the image should still work.
Step 2: Texture on each face
Next we will create a material for each of the 6 images, and map one to each face. Use the same style of code above for the grass, apple, etc. Then create a list of all these materials:
var materials = [woodMaterial, appleMaterial, wallpaperMaterial,
      skyMaterial, grassMaterial, stoneMaterial];

// replace cube creation with:
cube = new THREE.Mesh(geometry, new THREE.MeshFaceMaterial(materials));
You should get something that looks like this:
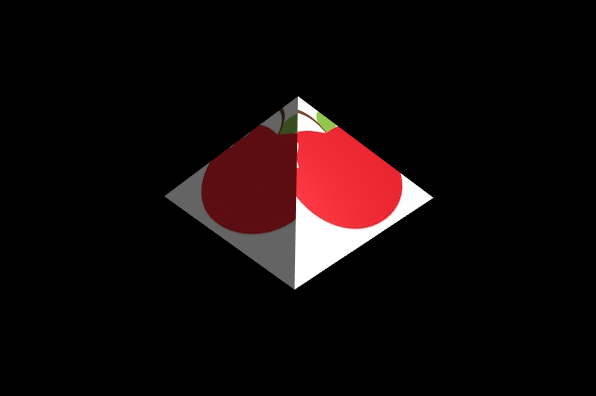
Step 3: UV mapping
Lastly, comment out the cube and try texture mapping a pyramid. To set up the pyramid geometry, we'll use very similar code to what we did before with vertices and faces:
// set up the geometry for our pyramid
var pyramidGeom = new THREE.Geometry();

pyramidGeom.vertices = [  // array of Vector3 giving vertex coordinates
  new THREE.Vector3( 1, 0, 1 ),    // vertex number 0
  new THREE.Vector3( 1, 0, -1 ),   // vertex number 1
  new THREE.Vector3( -1, 0, -1 ),  // vertex number 2
  new THREE.Vector3( -1, 0, 1 ),   // vertex number 3
  new THREE.Vector3( 0, 1, 0 )     // vertex number 4
];

pyramidGeom.faces = [  // array of Face3 giving the triangular faces
  new THREE.Face3( 3, 2, 1),  // one half of the bottom face
  new THREE.Face3( 3, 1, 0),  // second half of the bottom face
  new THREE.Face3( 3, 0, 4),  // remaining faces are the four sides
  new THREE.Face3( 0, 1, 4),
  new THREE.Face3( 1, 2, 4),
  new THREE.Face3( 2, 3, 4)
];

pyramidGeom.computeFaceNormals();
Then we will map each face to a set of UV coordinates of the texture. First define a set of UV coordinates to use. Then for each of the 6 faces, choose from these UV coordinates to build up the texture.
// set up several uv coordinates to repeatedly use below
var uvcoords = [new THREE.Vector2(0, 0), ...];

// erase any previous face coordinates
pyramidGeom.faceVertexUvs[0] = [];

// write one line for each of the 6 faces
pyramidGeom.faceVertexUvs[0].push([uvcoords[0], uvcoords[1], uvcoords[2]]); // example
...

// create the pyramid using the apple texture
pyramid = new THREE.Mesh( pyramidGeom, appleMaterial);
pyramid.rotation.set(0.4,-0.8,0);
pyramid.position.z = ?;
Think about ways to map the apple to this pyramid, maybe something like below. Could you do it in a different way?
Finish Up
You do not have to turn this lab in, but make sure both you and your pair programming partner have a copy by the end of the lab. Homework 8 will continue the concepts in this lab.