CSC 240: Computer Graphics
Homework 1: Snowflake
Due: Tuesday, Sept. 20, 11:59pm on Moodle
1) Download the starter code
Download hw1.html (right-click on this link and then choose "Save As"). Open this file in Sublime (or your preferred editor). This file contains some boiler-plate code and two methods that you'll implement.
2) Line function
First think about what arguments the line function should take in and add these to your code. Then implement the method, using the algorithm discussed in class on Wednesday. Your method should not use any built-in line drawing functions (we'll use those later). Instead, we will only use "pixel coloring" by coloring 1x1 rectangles:
graphics.fillRect(x,y,1,1) // fill a 1x1 rectangle with an upper-left corner at (x,y)
This page of HTML Color Names is useful for pre-defined colors.
3) Testing
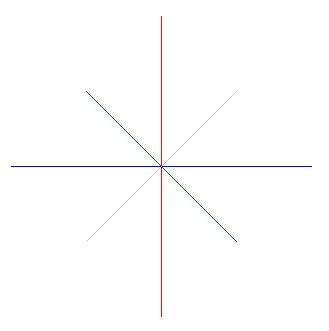
As you are implementing the line method, make sure to test it out by calling it from the draw method. Your draw method will end up consisting of several calls to your line method. To facilitate testing, create a snowflake or another shape that uses lines with different slopes. An example is shown below:

(Note: snowflakes actually have 6-fold symmetry, but this example is better for testing slopes of 0 or ∞.)
As another test, try out a line with endpoints (50,350) and (75,50). It might not look very good. Why is that? Modify your line algorithm to account for cases like this.
4) Extras
(Note: not for extra credit this time, just for more practice with JavaScript functions and HTML Canvas.)
- Experiment with your shape: different pattern,
different color, different background color, different size.
- Going
further: automate your snowflake drawing in a separate
method, maybe something that takes as arguments the center position of the snowflake and/or the radius. Use this method to draw multiple snowflakes or randomly positioned snowflakes.
- Augment your line drawing method to include a line width argument.
Throughout the semester I'll often demo examples of excellent student work. If you prefer I not show your work, please let me know.
5) Submit
Take a screenshot of your end result (save as hw1.png). Submit both files (hw1.html and hw1.png) on Moodle.